Lunar Sketching
To view that video click here: https://youtu.be/pc4u3_9ET2w
The Flickr version of the video is here: https://flic.kr/p/2embLtJ

It’s up to you whether you prefer to sketch on white paper
with pencils or if you would rather use black paper and pastel/charcoal
pencils. I enjoy both, but you can get such a striking result using black
paper, so that is now my material of choice. I just buy black paper – it doesn’t
need to be anything fancy. If it has too much texture it will be difficult to
get fine detail into your work with pastels. Do keep in mind that pencil sketches won't dull like your pastel sketch will.
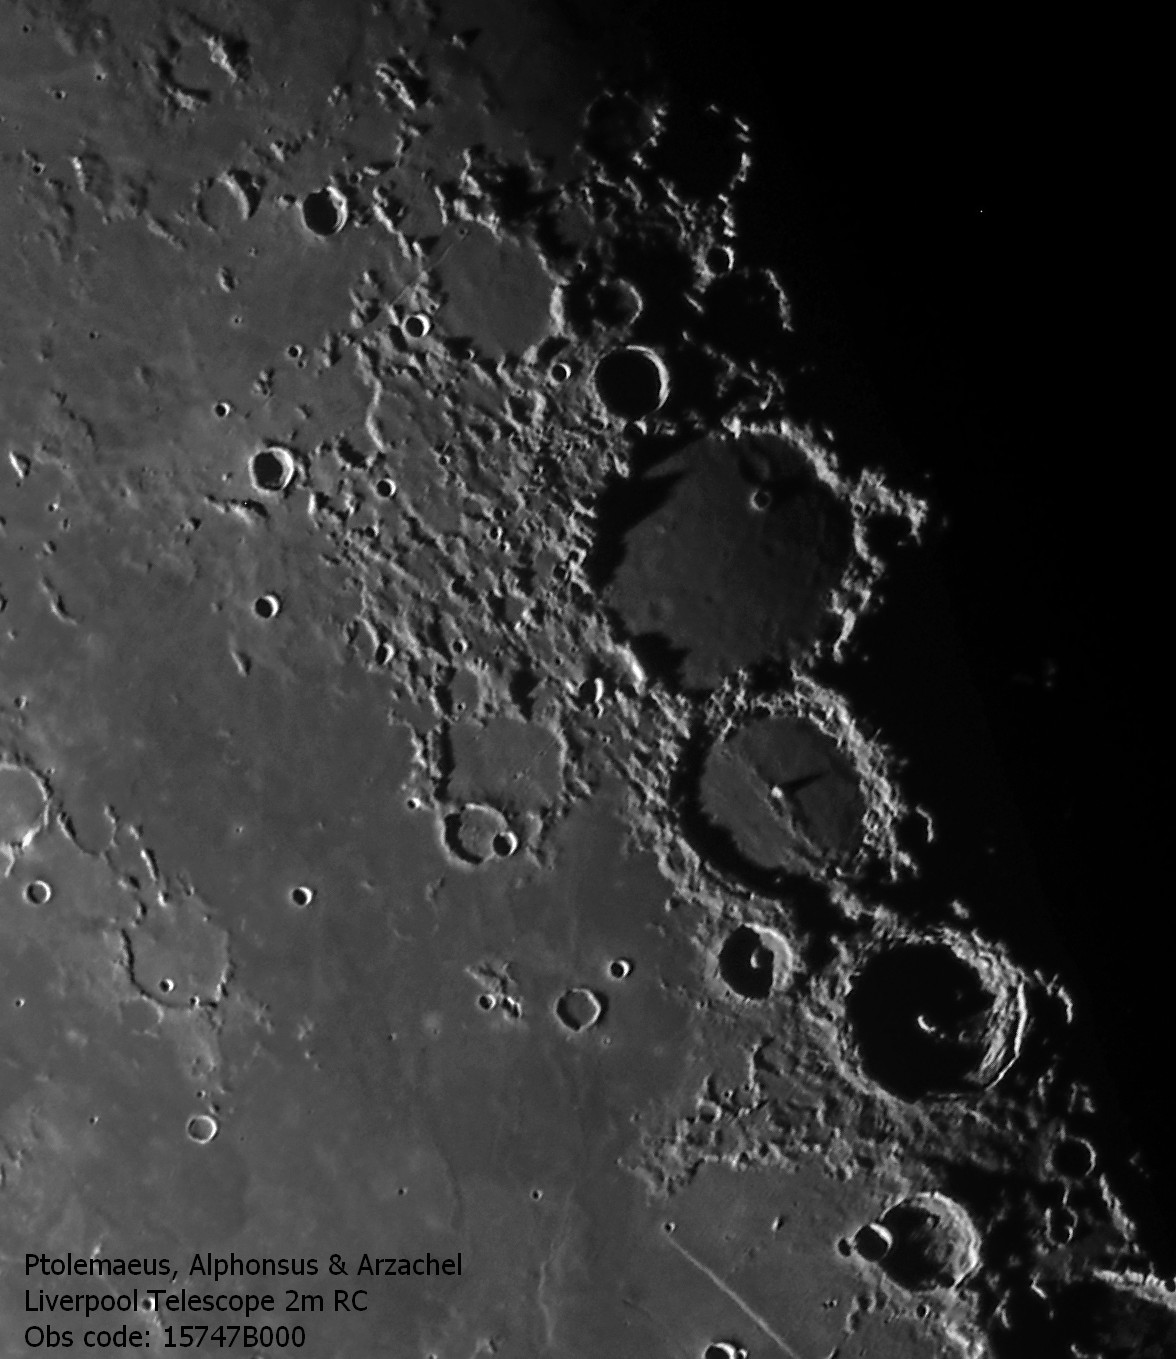
To begin, chose a photo that has lots of really well defined
regions of light and shadow. The photo below was taken with the Liverpool
Telescope which is a 2 metre robotic telescope in La Palma. Images taken
through the National School’s Observatory access to this telescope are all
available to use for educational purposes. I chose this photo because it is one
of my favourite lunar regions and it has some lovely crater shadows. I
downloaded the image and processed it first.
To begin, chose which part of the image you are going to
sketch. You don’t have to draw the entire thing, so don’t panic if you feel a
bit overwhelmed! Just pick your favourite part of the image, zoom in on it and
sketch that. I start my sketches by very
lightly outlining the regions I’m drawing. If it’s a full disc image you’re
working from then draw a circle first. Remember to fill your page because drawing things larger is much easier than trying to squeeze detail into a small space.

In this instance, the craters are close to the terminator, so
first, I very lightly marked out where the boundary was between the illuminated
and non-illuminated sides, taking into account the crater morphology along the
terminator. Then I lightly marked out the outlines of the craters. If you think
of your image as a clock face, it will help you with placement of the features.
You can also draw out a grid pattern on a clear acetate sheet and lay it over
the photo. Then you can tackle one small square at a time. Once I’d finished
with some basic outlining, I lightly shaded all of the illuminated side with
white pastel pencil and blended it into the paper using cotton wool to create a
light grey base colour.

Once I had a grey base, I began to mark out the regions
which were very black, like the shadows on the crater floors. Alongside this, I
also began to mark out the areas which were the brightest white. It helps to
view the lunar surface with an abstract eye, and focus on just the shapes that
the light and shade are making. Always keep in the back of your mind where the
light source is coming from that is creating the shadows. I constantly switch
between white and black pencil when I’m doing this step. Once I had the white
and black areas marked out, I filled them in.

Now the rest of your sketch is about figuring out all the
shades of grey in between the white and black. I work on small areas at a time,
zooming in on the picture if I need to. But remember to zoom out again before
moving on the next bit or else your scale will completely wrong in the rest of
your sketch! I find blending with cotton buds really useful for this step. I
usually have a couple for blending lighter shades and a couple for blending
darker shades.

When was happy with the fine detail around the craters, I
moved onto the flatter surface regions. Once
you’ve blended a few times, there will be a lot of pastel colour on the cotton
buds, so you can use them to mark out and blend out differences in colour on
the surface. Then I added the finishing touches.

What I find interesting in my sketching workshops is how
everybody can be sketching the same crater, yet every single sketch looks
different. You can see this in the first collage photo below which shows the results
from a class of year 10 pupils at a local high school. The second collage is from my lunar sketching workshop at Solarsphere 2019. Most of these sketches were created by people who had never done astronomy sketching before but the results were fantastic! No two people
will ever sketch something in exactly the same way; your sketch will be your
own unique style. Don’t compare your sketch with those produced by other
people.


If you have done your sketch with pastels, it's important that you keep it in a clear plastic folder to prevent it from getting ruined. You can fix pastel artwork with fixing spray or hairspray, but I've never yet found one that doesn't spoil my picture. As soon as I finish a sketch, I photograph it. I then put my original artwork into a folder and try not to get them out. I never take my folder of originals out of the house! I usually order printed copies of the photograph of the sketch and keep those in a separate folder which I take to talks with me. Pencil sketches will be fine to keep without any fixing.
Once you've had a go at lunar sketching, why not try sketching some deep sky objects? It's really good fun sketching galaxies and nebulae from photographs because they are so much more detailed than what you can see with the naked eye through a telescope. The picture below is a sketching I did from a photo of Messier 51 the Whirlpool Galaxy. I have uploaded the photos I use in sketching workshops to a Dropbox folder so you can download the images yourself and try to sketch from them. You can access the folder here.There is also a sub-folder there which contains some of the sketches I've completed myself.
Once you've had a go at lunar sketching, why not try sketching some deep sky objects? It's really good fun sketching galaxies and nebulae from photographs because they are so much more detailed than what you can see with the naked eye through a telescope. The picture below is a sketching I did from a photo of Messier 51 the Whirlpool Galaxy. I have uploaded the photos I use in sketching workshops to a Dropbox folder so you can download the images yourself and try to sketch from them. You can access the folder here.There is also a sub-folder there which contains some of the sketches I've completed myself.
When you've perfected your skills working from photographs, you can apply exactly the same principles to sketching at the eyepiece. In addition to recording your astronomical observations, astronomy sketching is a lovely art form in its own right. I have produced sketches of the Moon as it looked on a date that has meaning to a loved one, framed it and given it as a gift.
I hope you found this blog helpful and that you feel inspired to have a go at sketching. Good luck and remember that practice makes perfect!

----------------------------------------------------------------------------
Visit my website: www.marymcintyreastronomy.co.uk
Follow me on Facebook: facebook.com/marymcintyreastronomy
Follow me on Twitter: @spicey_spiney
Follow me on Instagram: spiceyspiney
Follow me on Flickr: spicey_spiney
You Tube: Mary McIntyre nee Spicer
Blogs/Articles: http://marysastronomyblogs.blogspot.com
To visit my Etsy shop: https://www.etsy.com/uk/shop/MaryMcCreations
No comments:
Post a Comment
Note: only a member of this blog may post a comment.